
Back Up an OVHcloud Managed PostgreSQL Database
Introduction
This tutorial shows you how to back up an OVHcloud Managed PostgreSQL database using Plakar. The backup is performed using a logical SQL dump created with pg_dump, streamed directly into Plakar and stored as an encrypted, deduplicated snapshot in OVHcloud Object Storage.
By the end of this guide, you will have a working PostgreSQL backup stored safely outside your database infrastructure.
Architecture Overview
stdin integration"] end subgraph DB["OVHcloud Managed PostgreSQL"] Postgres["PostgreSQL"] end subgraph Storage["OVHcloud S3 Object Storage"] S3["Kloset Store
(Encrypted & Deduplicated)"] end Postgres -->|SQL dump| PGDump PGDump -->|stdin| Plakar Plakar -->|Snapshots| S3 classDef client fill:#524cff,color:#ffffff classDef db fill:#ffe4e6 classDef storage fill:#dbeafe class PGDump,Plakar client class Postgres db class S3 storage
Step 1: Create an OVHcloud Managed PostgreSQL Database
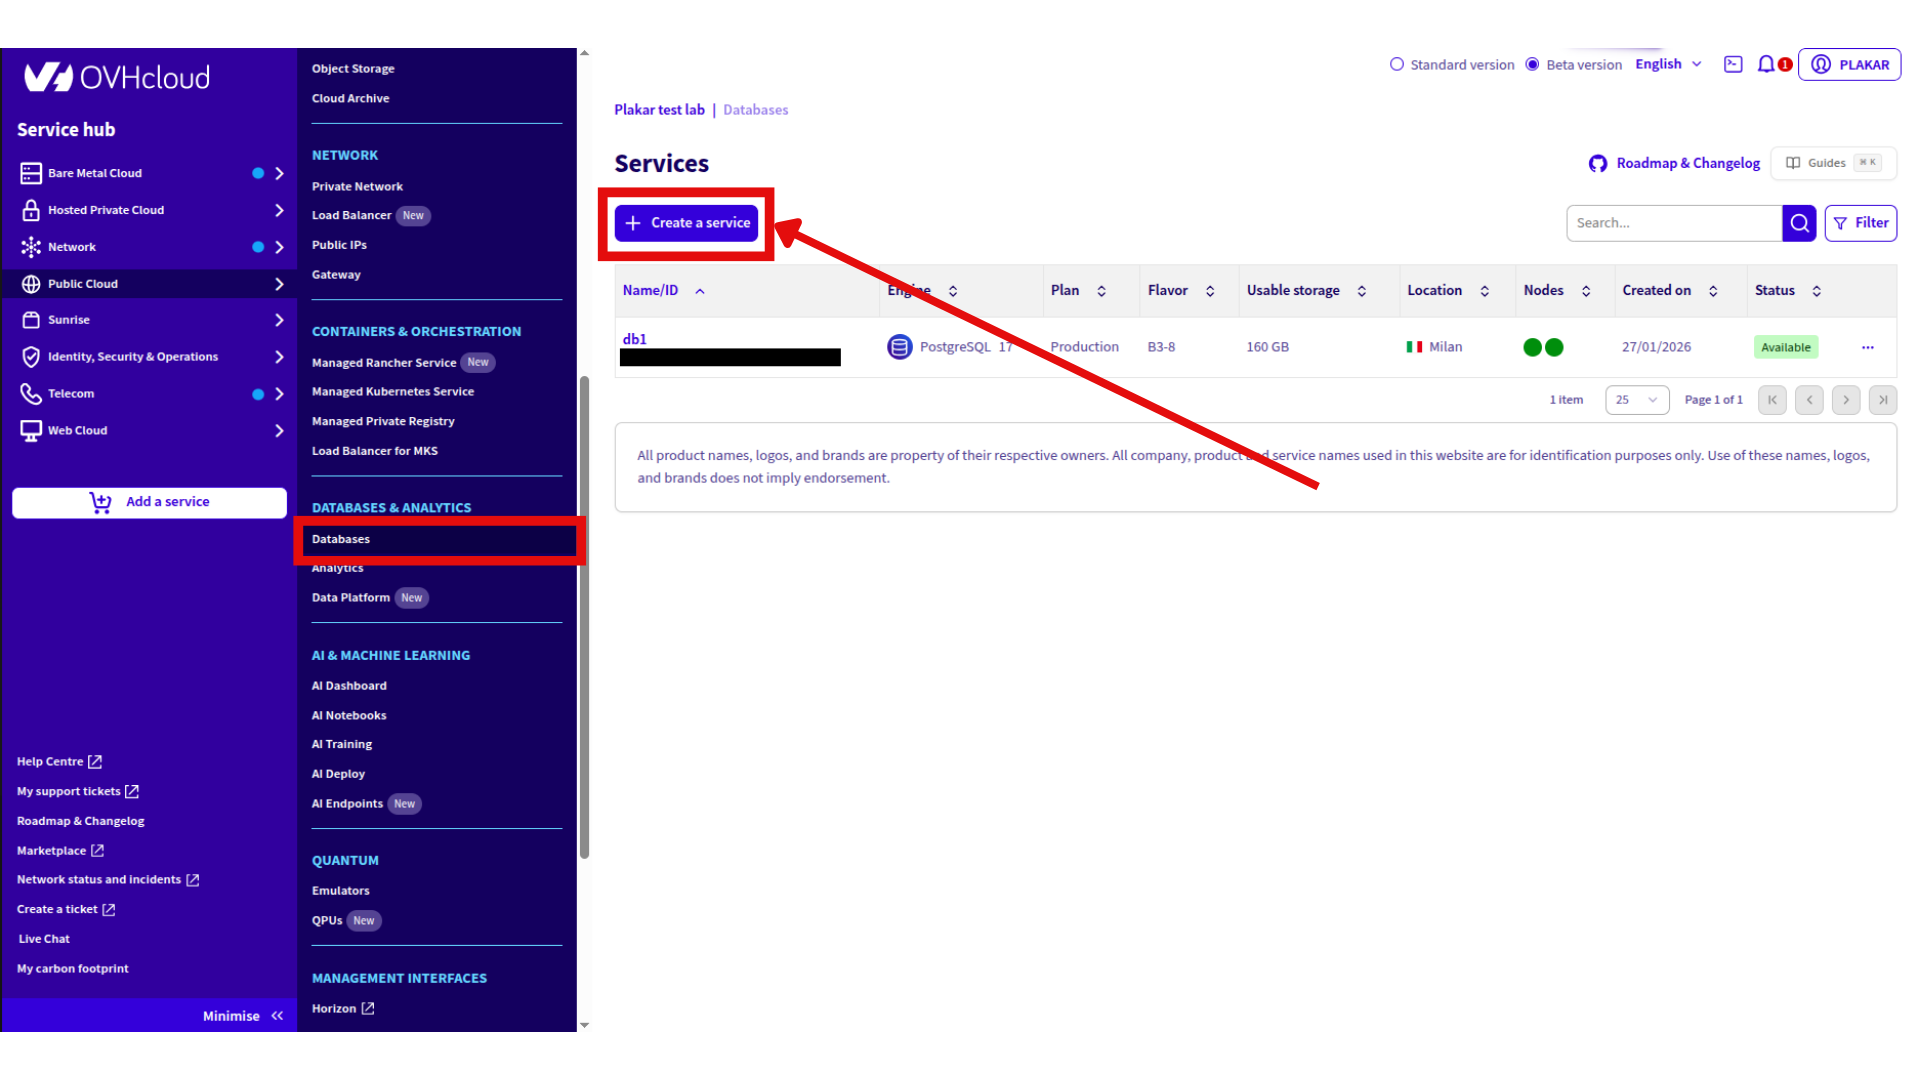
- Log in to the OVHcloud Control Panel
- Go to Public Cloud → Databases & Analytics → Databases
- Click Create a service to provision a database
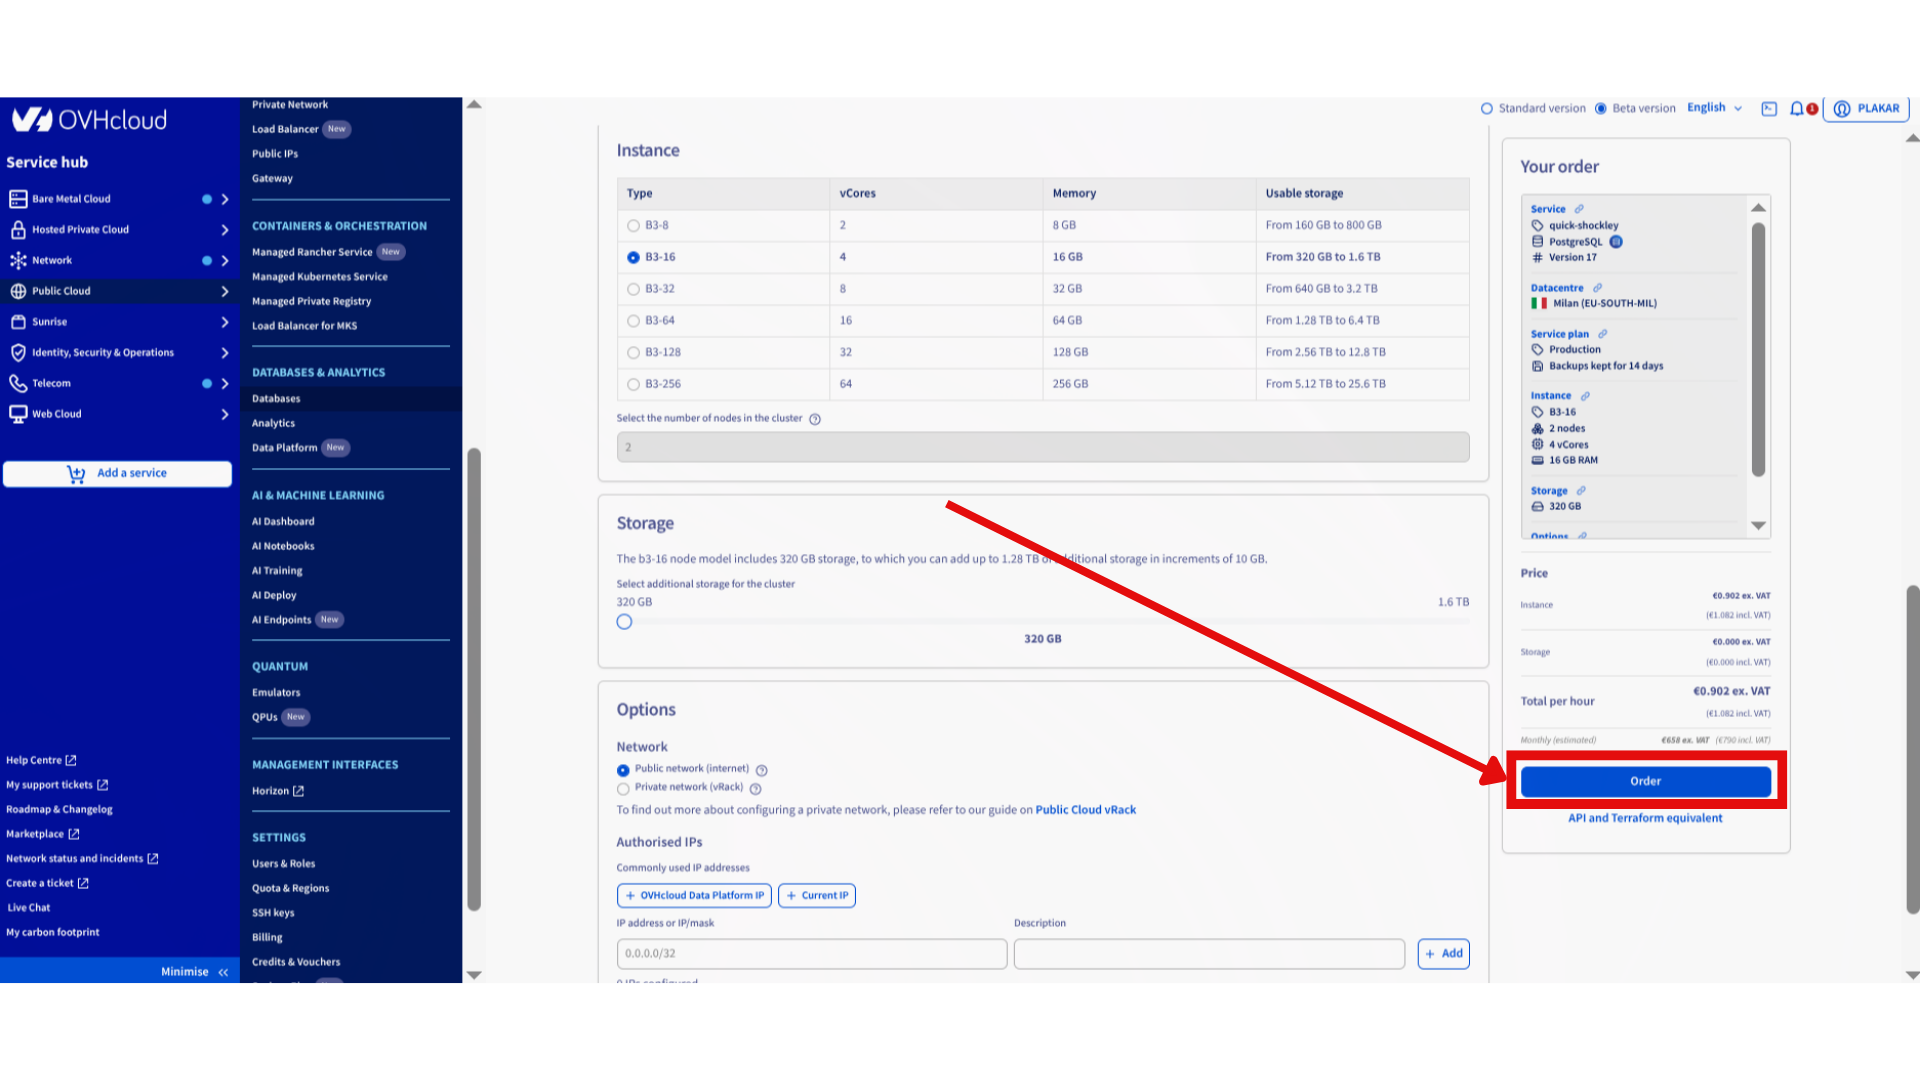
- Add information about the new database:
- Enter database name
- Database engine: PostgreSQL
- PostgreSQL version (OVHcloud supports versions 14 to 18)
- Instance provision (vCores, memory, usable storage)
- Network: Public network
- Click Order
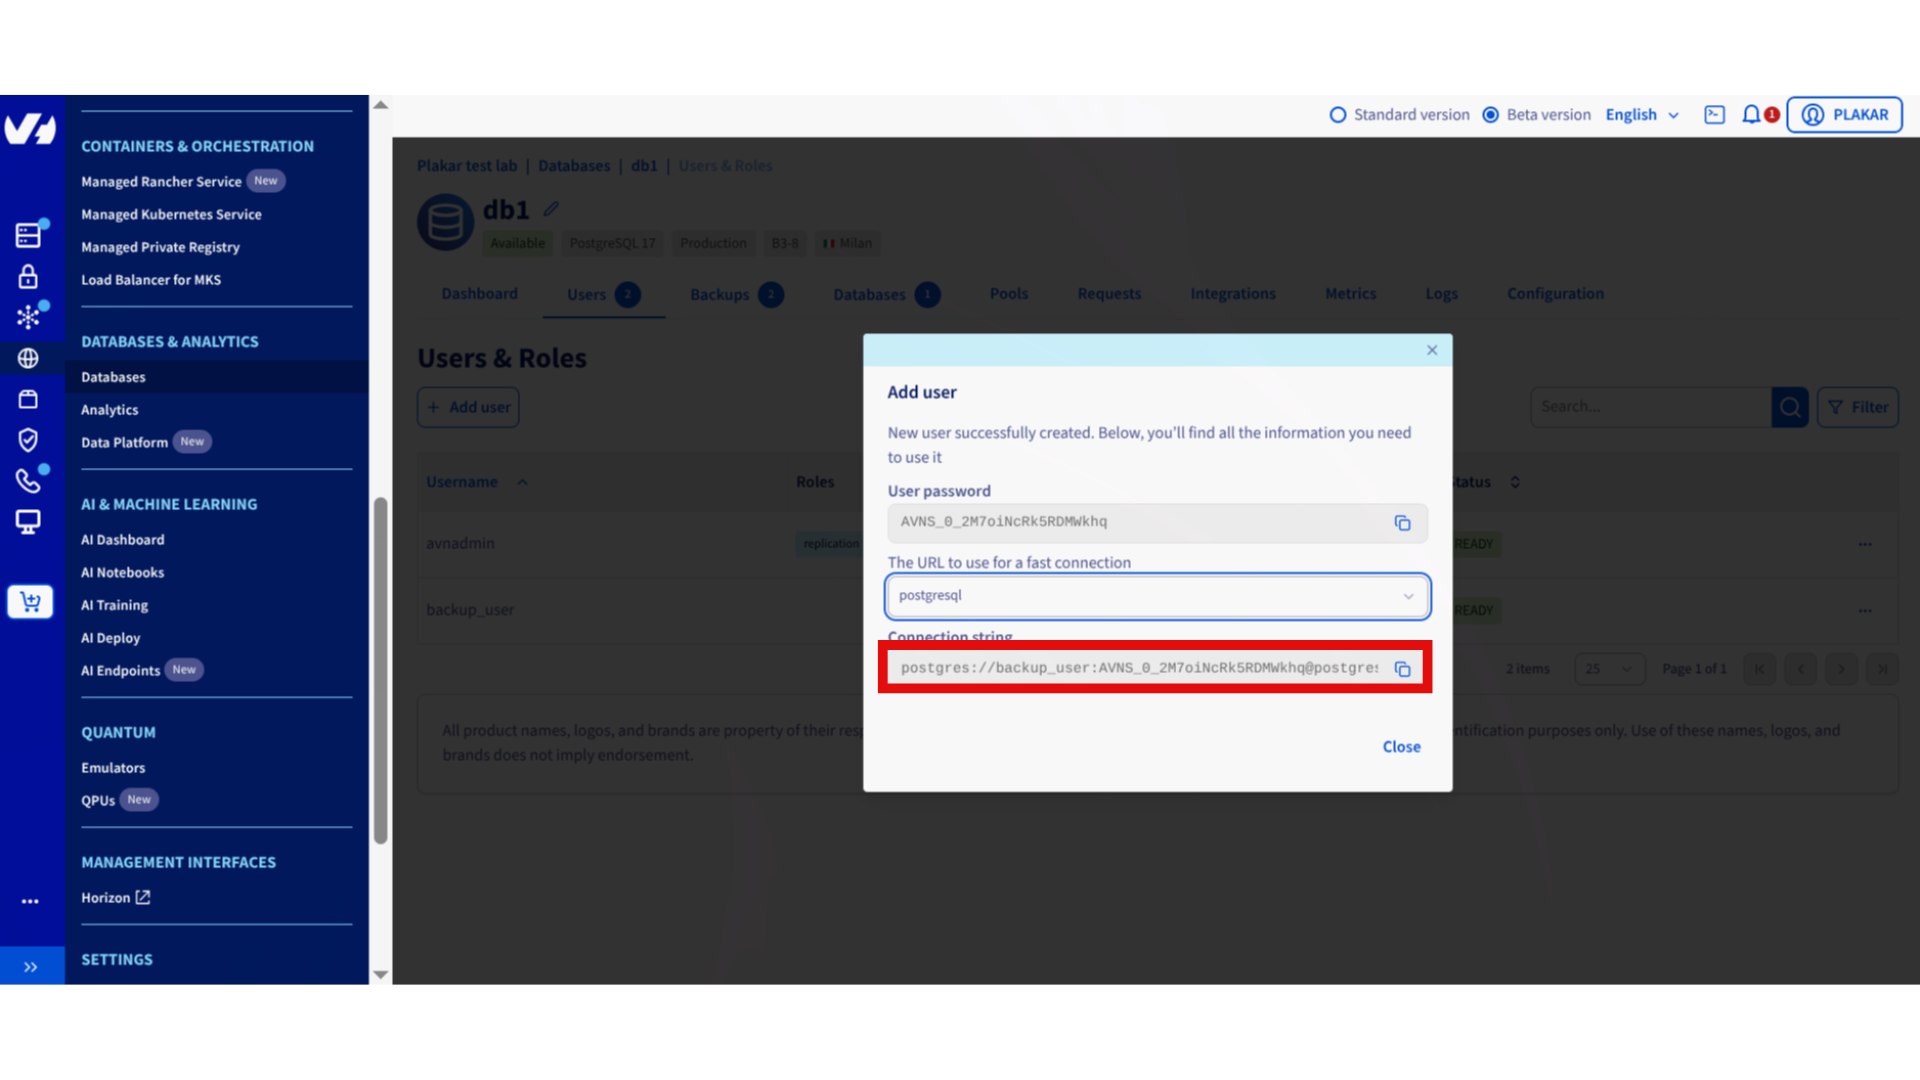
Step 2: Create a Backup User
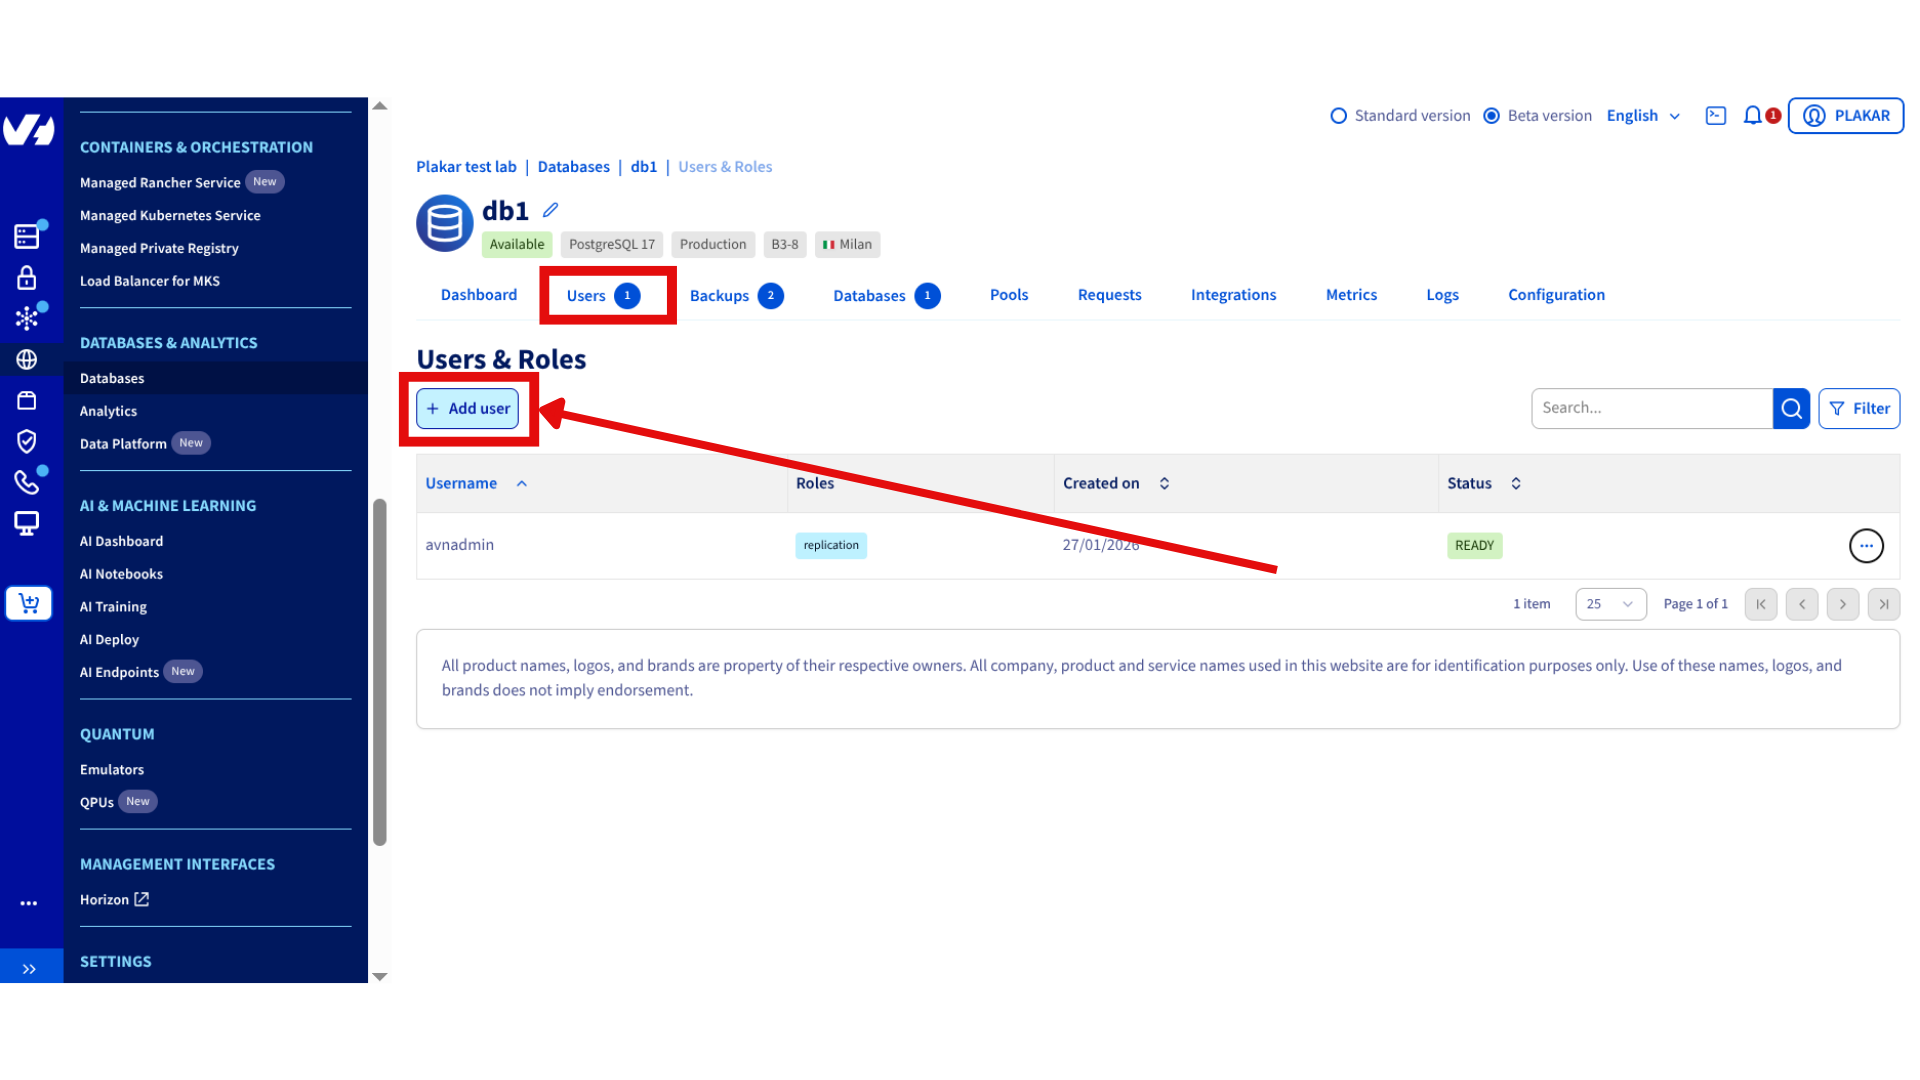
- Open your PostgreSQL database in the OVHcloud database dashboard
- Go to the Users tab
- Click Add user
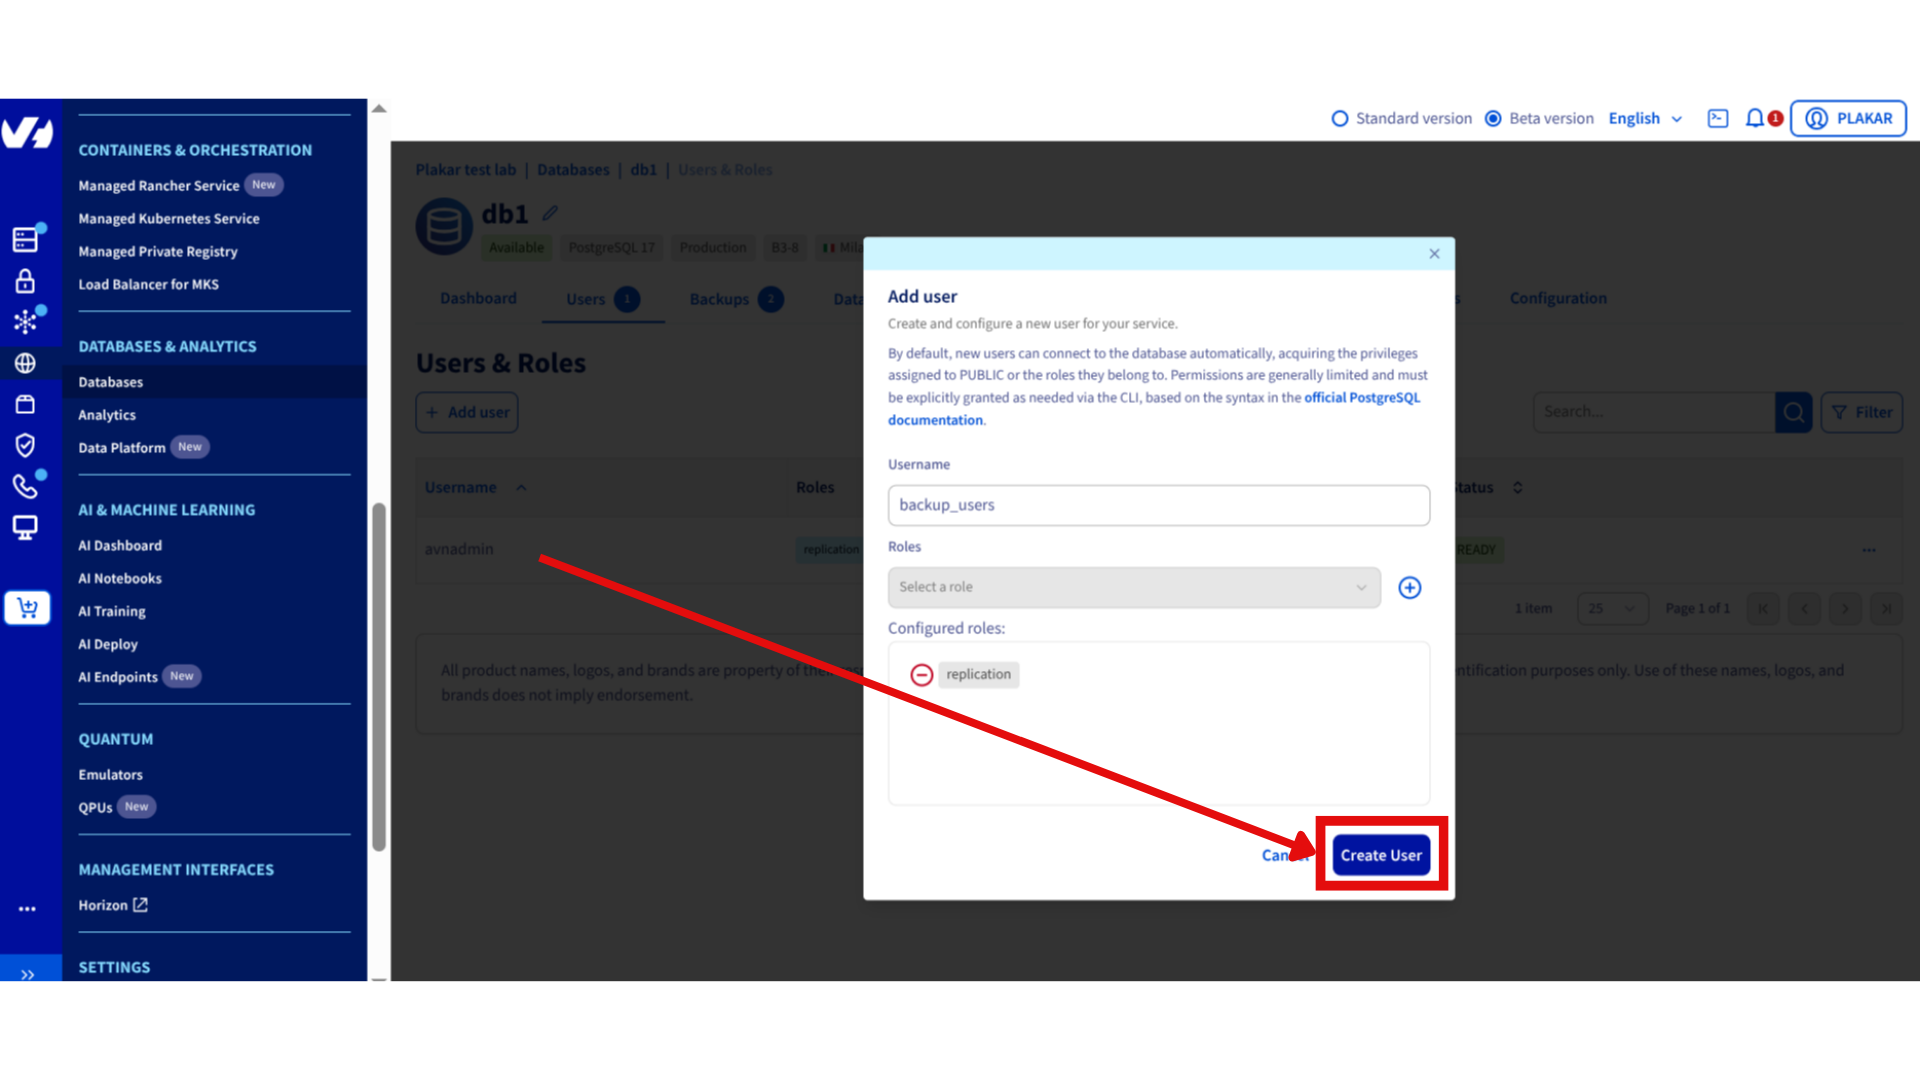
- Set:
- Username:
backup_user - Role:
replication
- Username:
- Save the connection string
Step 3: Install Required Tools
On the machine where you will run the backups (your computer or a backup VPS), install the PostgreSQL client and Plakar.
sudo apt update
sudo apt install postgresql-client
Install Plakar following the official installation guide.
Step 4: Configure PostgreSQL Environment Variables
Set the PostgreSQL environment variables from the connection string so pg_dump can connect non‑interactively.
export PGHOST=<DB_HOST>
export PGPORT=5432
export PGUSER=<DB_USER>
export PGPASSWORD=<DB_PASSWORD>
Verify the connection:
psql -X <DB_NAME>
Exit with \q.
Step 5: Install the S3 Integration
First, log in to Plakar so you can install integrations:
plakar login -email you@example.com
# OR
plakar login -github
Once logged in, install the S3 integration:
plakar pkg add s3
Step 6: Configure OVHcloud S3 Object Storage in Plakar
Create an OVHcloud S3 Object Storage bucket and retrieve your S3 credentials from the OVHcloud dashboard.
If you have not done this yet, follow the guide:
OVHcloud as a dedicated backup server
Add the bucket as a Plakar Kloset store:
plakar store add ovhcloud-s3-postgres \
  location=s3://<S3_ENDPOINT>/<BUCKET_NAME> \
  access_key=<ACCESS_KEY> \
  secret_access_key=<SECRET_KEY> \
  use_tls=true
Replace:
<S3_ENDPOINT>with your OVHcloud S3 endpoint (for example:s3.eu-west-par.io.cloud.ovh.net)<BUCKET_NAME>with the container name you created (for example:plakar-backups)<ACCESS_KEY>and<SECRET_KEY>with the credentials generated in the OVHcloud Control Panel
Initialize the Kloset Store
plakar at "ovhcloud-s3-postgres" create
Step 7: Back Up the PostgreSQL Database
Run the following command to back up the database:
pg_dump <DB_NAME> | plakar at "@ovhcloud-s3-postgres" backup stdin:dump.sql
When the command completes, the PostgreSQL database has been backed up as an encrypted, deduplicated snapshot in OVHcloud Object Storage.
Conclusion
You have successfully created a logical backup of an OVHcloud Managed PostgreSQL database using Plakar. This setup provides a simple, reliable foundation for protecting your PostgreSQL data and can be automated or extended as part of a broader backup strategy.
Found a bug or mistake in the documentation? Create an issue on GitHub