Setting up HTTPS access to Plakar Control Plane on a Scaleway Private Network
#Scaleway VPC allows you to build your own Virtual Private Cloud on top of Scaleway’s shared public cloud. Within each VPC, you can create Private Networks and attach Scaleway resources to them, as long as the resources are in an AZ within the network’s region. Attached resources can then communicate between themselves in isolated and secured networks, away from the public internet. The routing feature allows the different Private Networks of a VPC to communicate with each other.
In this guide, we will set up Plakar Control Plane (PCP) on a Scaleway Private Network and expose it securely over HTTPS. To do so, we will:
- Create a VPC and a Private Network within it
- Add a Public Gateway to the network so PCP can reach the internet
- Attach the PCP instance to the Private Network
- Create a Load Balancer and attach it to the Private Network
- Configure the Load Balancer to route traffic to PCP
- Generate and attach an SSL certificate to the Load Balancer
flowchart TD
  User["User / Browser"]
  DNS["Domain name"]

  subgraph Scaleway["Scaleway"]
    LBFrontend["Load Balancer Frontend
HTTPS :443
SSL certificate"]

    subgraph VPC["VPC"]
      subgraph PN["Private Network"]
        LBBackend["Load Balancer Backend
HTTP :80"]
        PCP["PCP Instance
No public IP"]
        Gateway["Public Gateway
Outbound internet access"]
      end
    end

    Internet["Internet
Updates, external services"]
  end

  User --> DNS
  DNS --> LBFrontend

  LBFrontend --> LBBackend
  LBBackend --> PCP

  PCP --> Gateway
  Gateway --> Internet

  LBBackend -. "Health check
GET /login
Expected 200" .-> PCP
Step 1: Create a VPC and a Private Network
#In the Scaleway console, navigate to Network > VPC in the left sidebar. Click Create VPC, select a region, and give it a name.
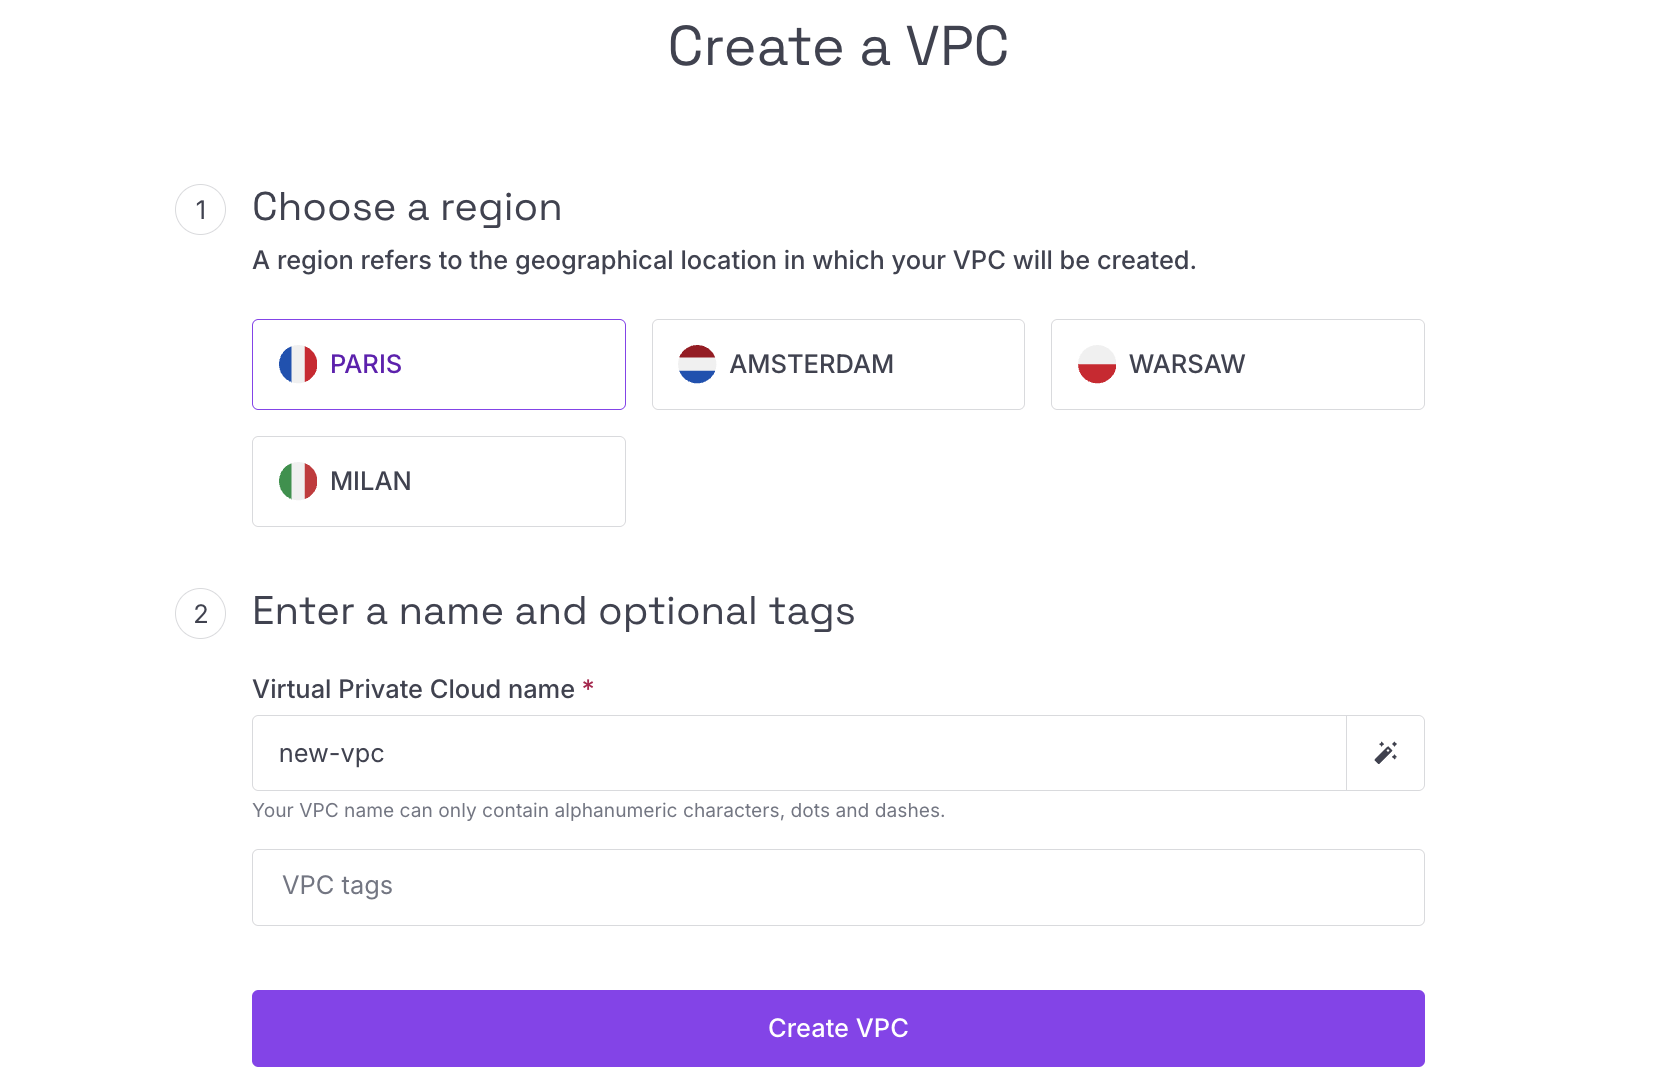
Once the VPC is created, open it and go to the Private Networks tab. Click Create private network and provide a name. No additional configuration is required at this stage.
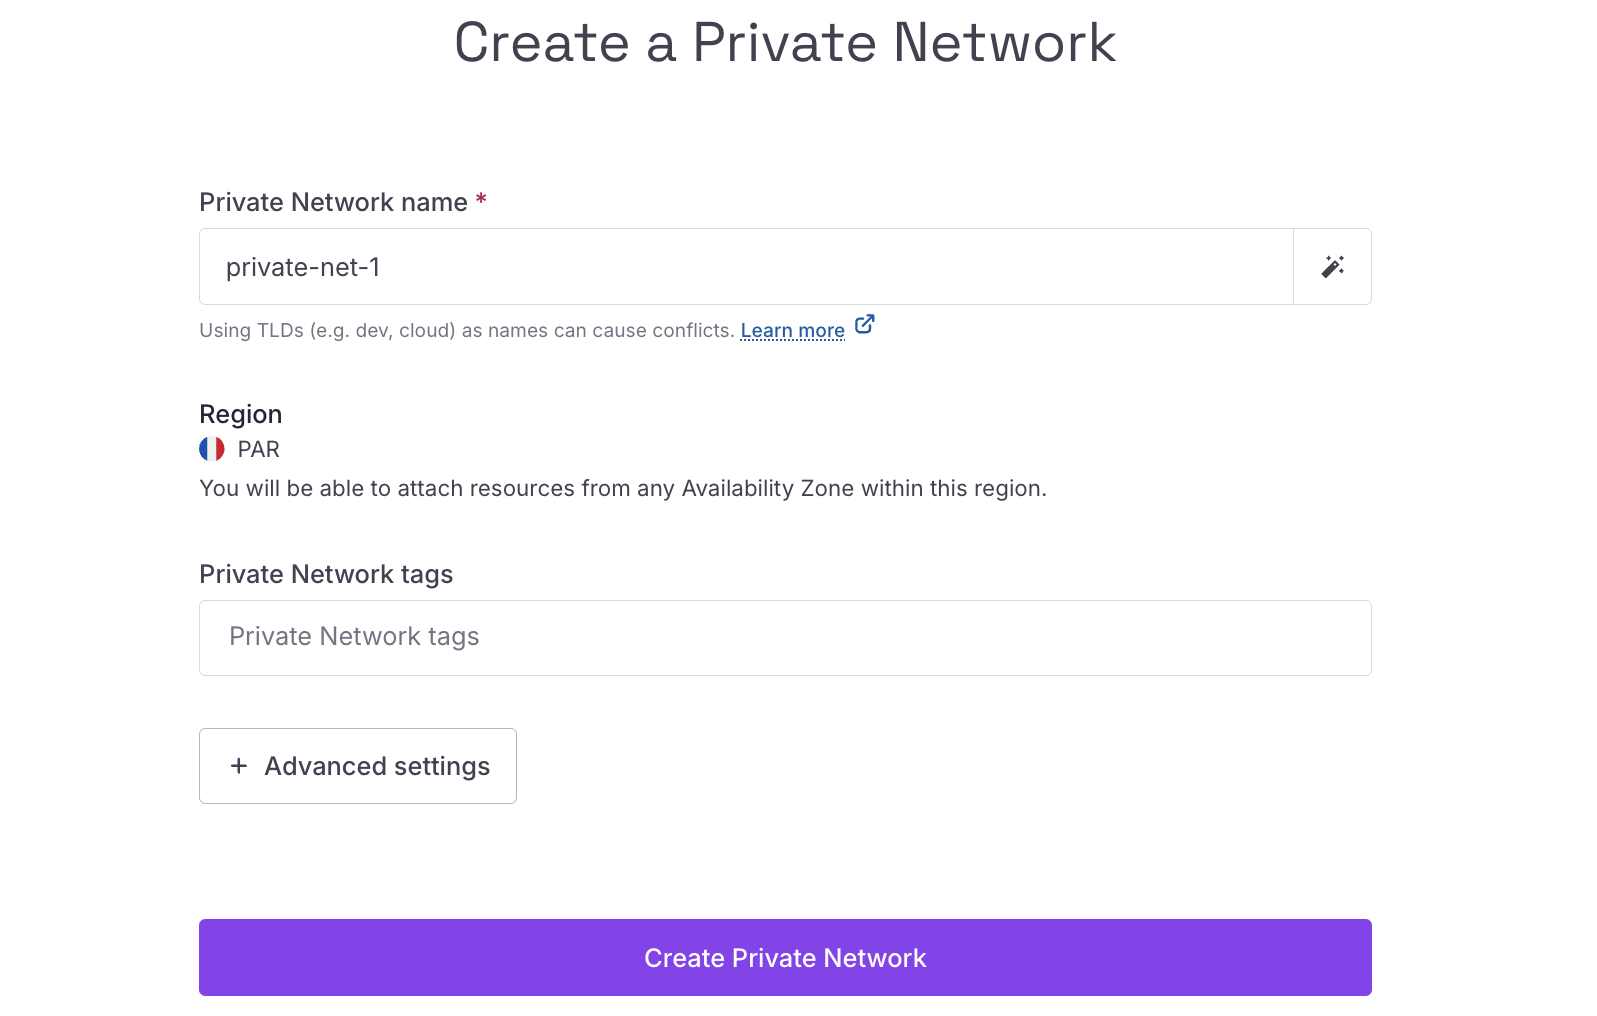
Step 2: Create a Public Gateway and attach it to the Private Network
#In the Scaleway console, navigate to Network > Public Gateways. Click Create public gateway and configure the following:
- Zone: select the zone that matches your Private Network
- Bandwidth: choose a gateway bandwidth tier
- IP: select Allocate new IP to assign a fresh public IP to the gateway
- Name: give the gateway a name
Once the gateway is created, open it and go to the Private Networks tab. Click Attach to a private network, select the Private Network created in Step 1, and configure the attachment:
- Advertise default route: enable this so that other resources on the Private Network learn the default route through the gateway, allowing them to reach the internet
- Private IPv4 address: leave this set to auto-allocate an available IP from the pool
If you ever replace this gateway with a new one, make sure Advertise default route is enabled on the new gateway’s attachment to the Private Network. Resources on the network learn the default route via DHCP, so after switching gateways, reboot the PCP instance to pick up the new route.
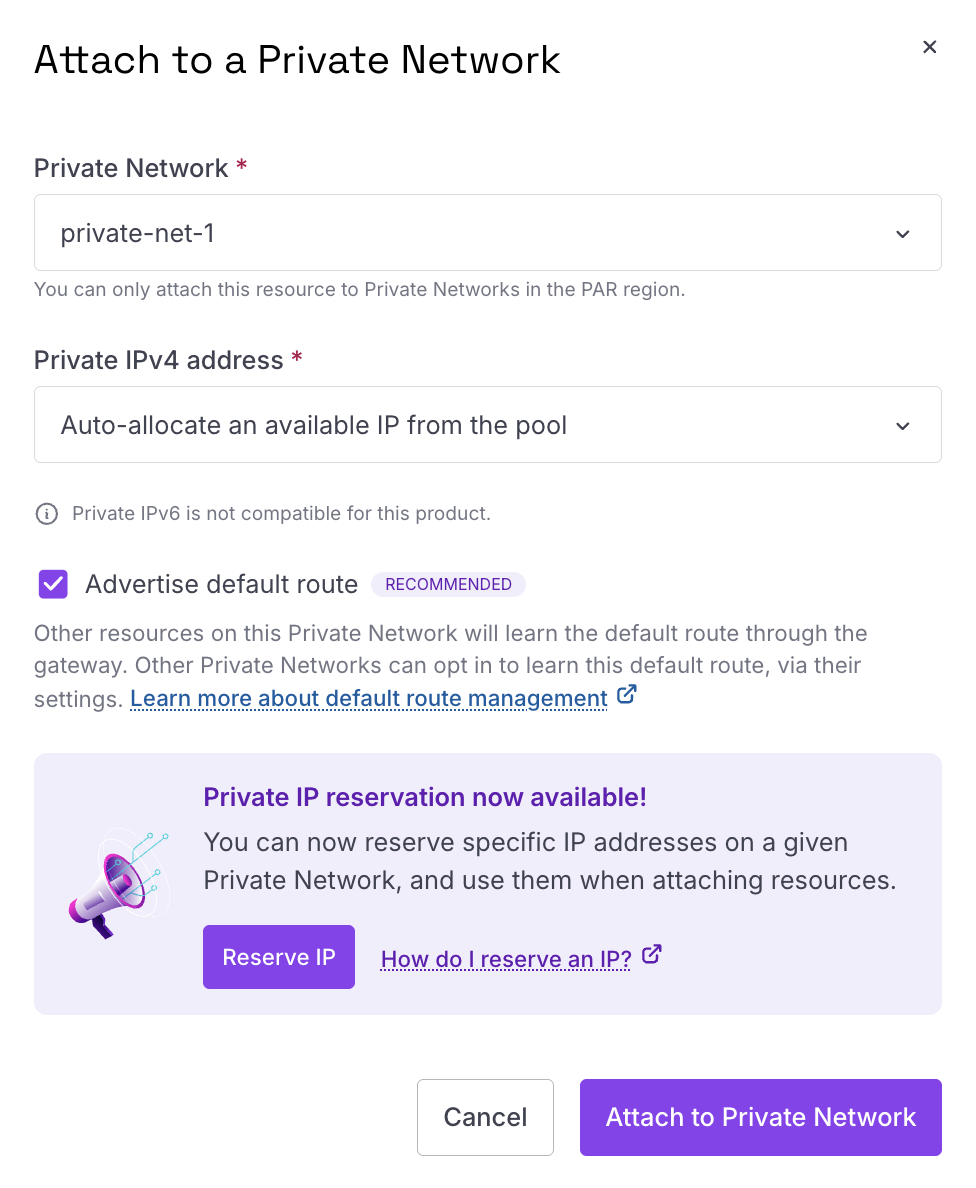
Step 3: Attach the PCP instance to the Private Network
#If you have not yet created your PCP instance, follow the Scaleway installation guide. When creating the instance, do not assign a public IPv4 or IPv6 address to it. The Public Gateway set up in Step 2 will provide internet access. You can also attach the instance to the Private Network directly during instance creation.
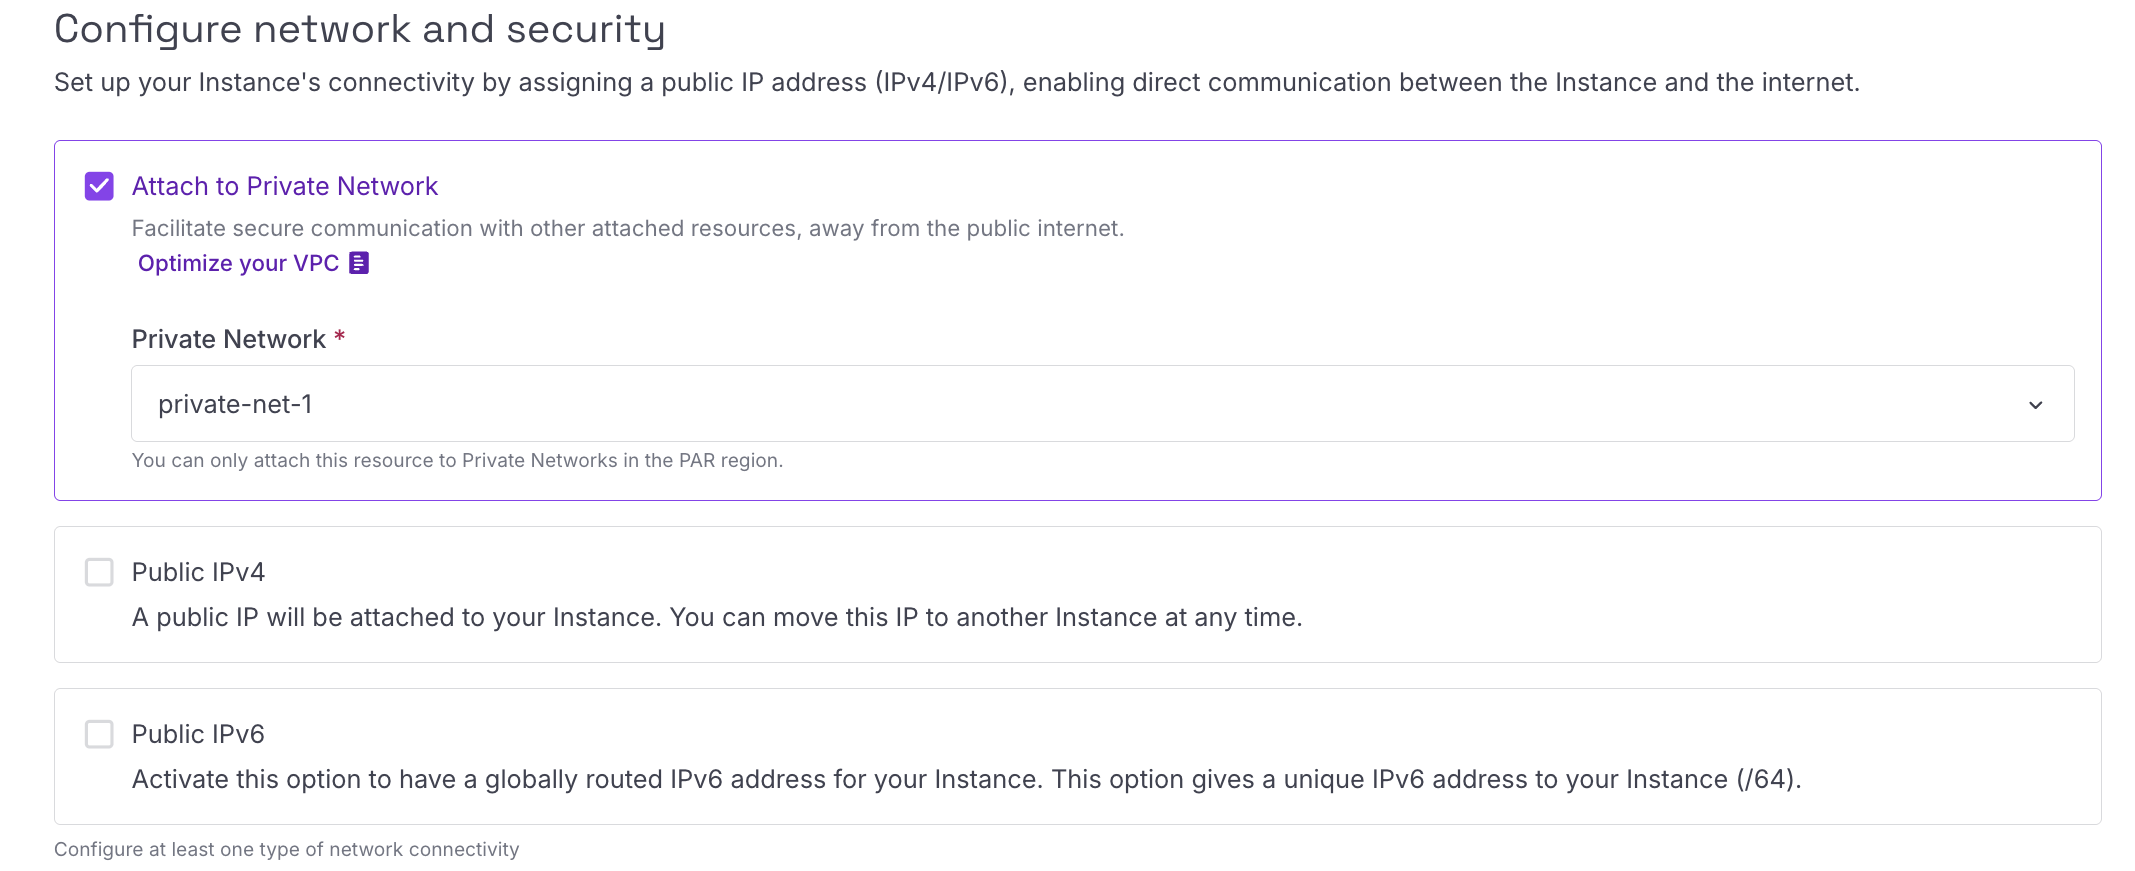
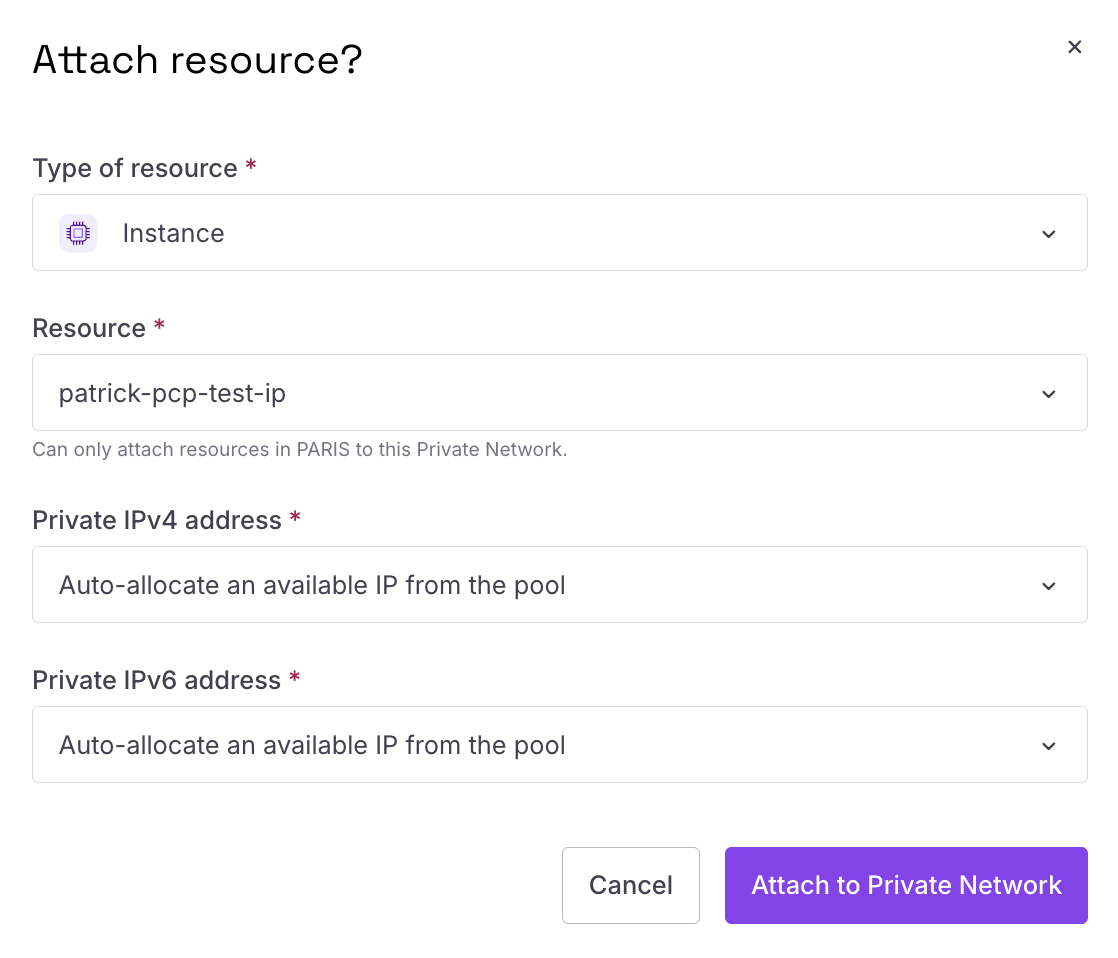
If your instance already exists, open your VPC in the Scaleway console, navigate to the Private Network created in Step 1, and click Attach a resource. Set the resource type to Instance, select your PCP instance, and leave both Private IPv4 address and Private IPv6 address set to auto-allocate from the pool.
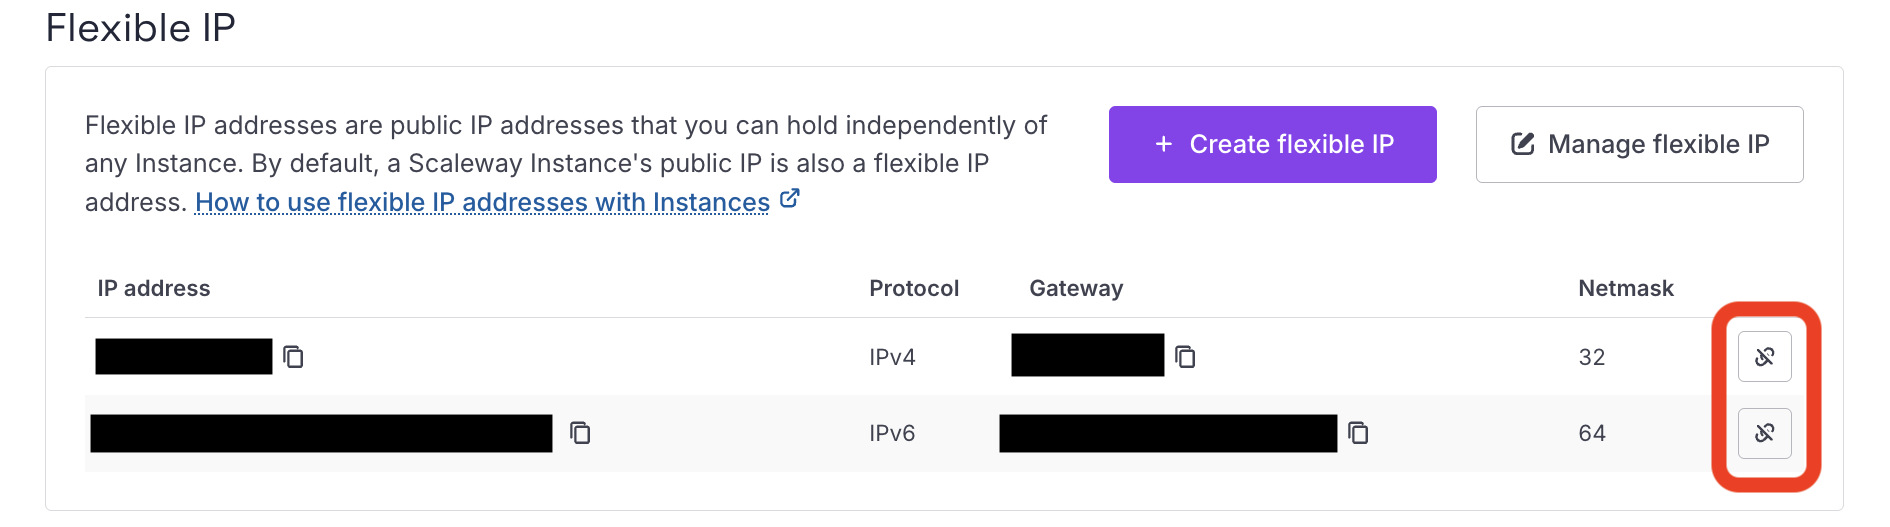
If your existing instance has a public IP attached, you can detach it from the instance details page under the Flexible IPs section.
Step 4: Create and configure the Load Balancer
#Create the Load Balancer
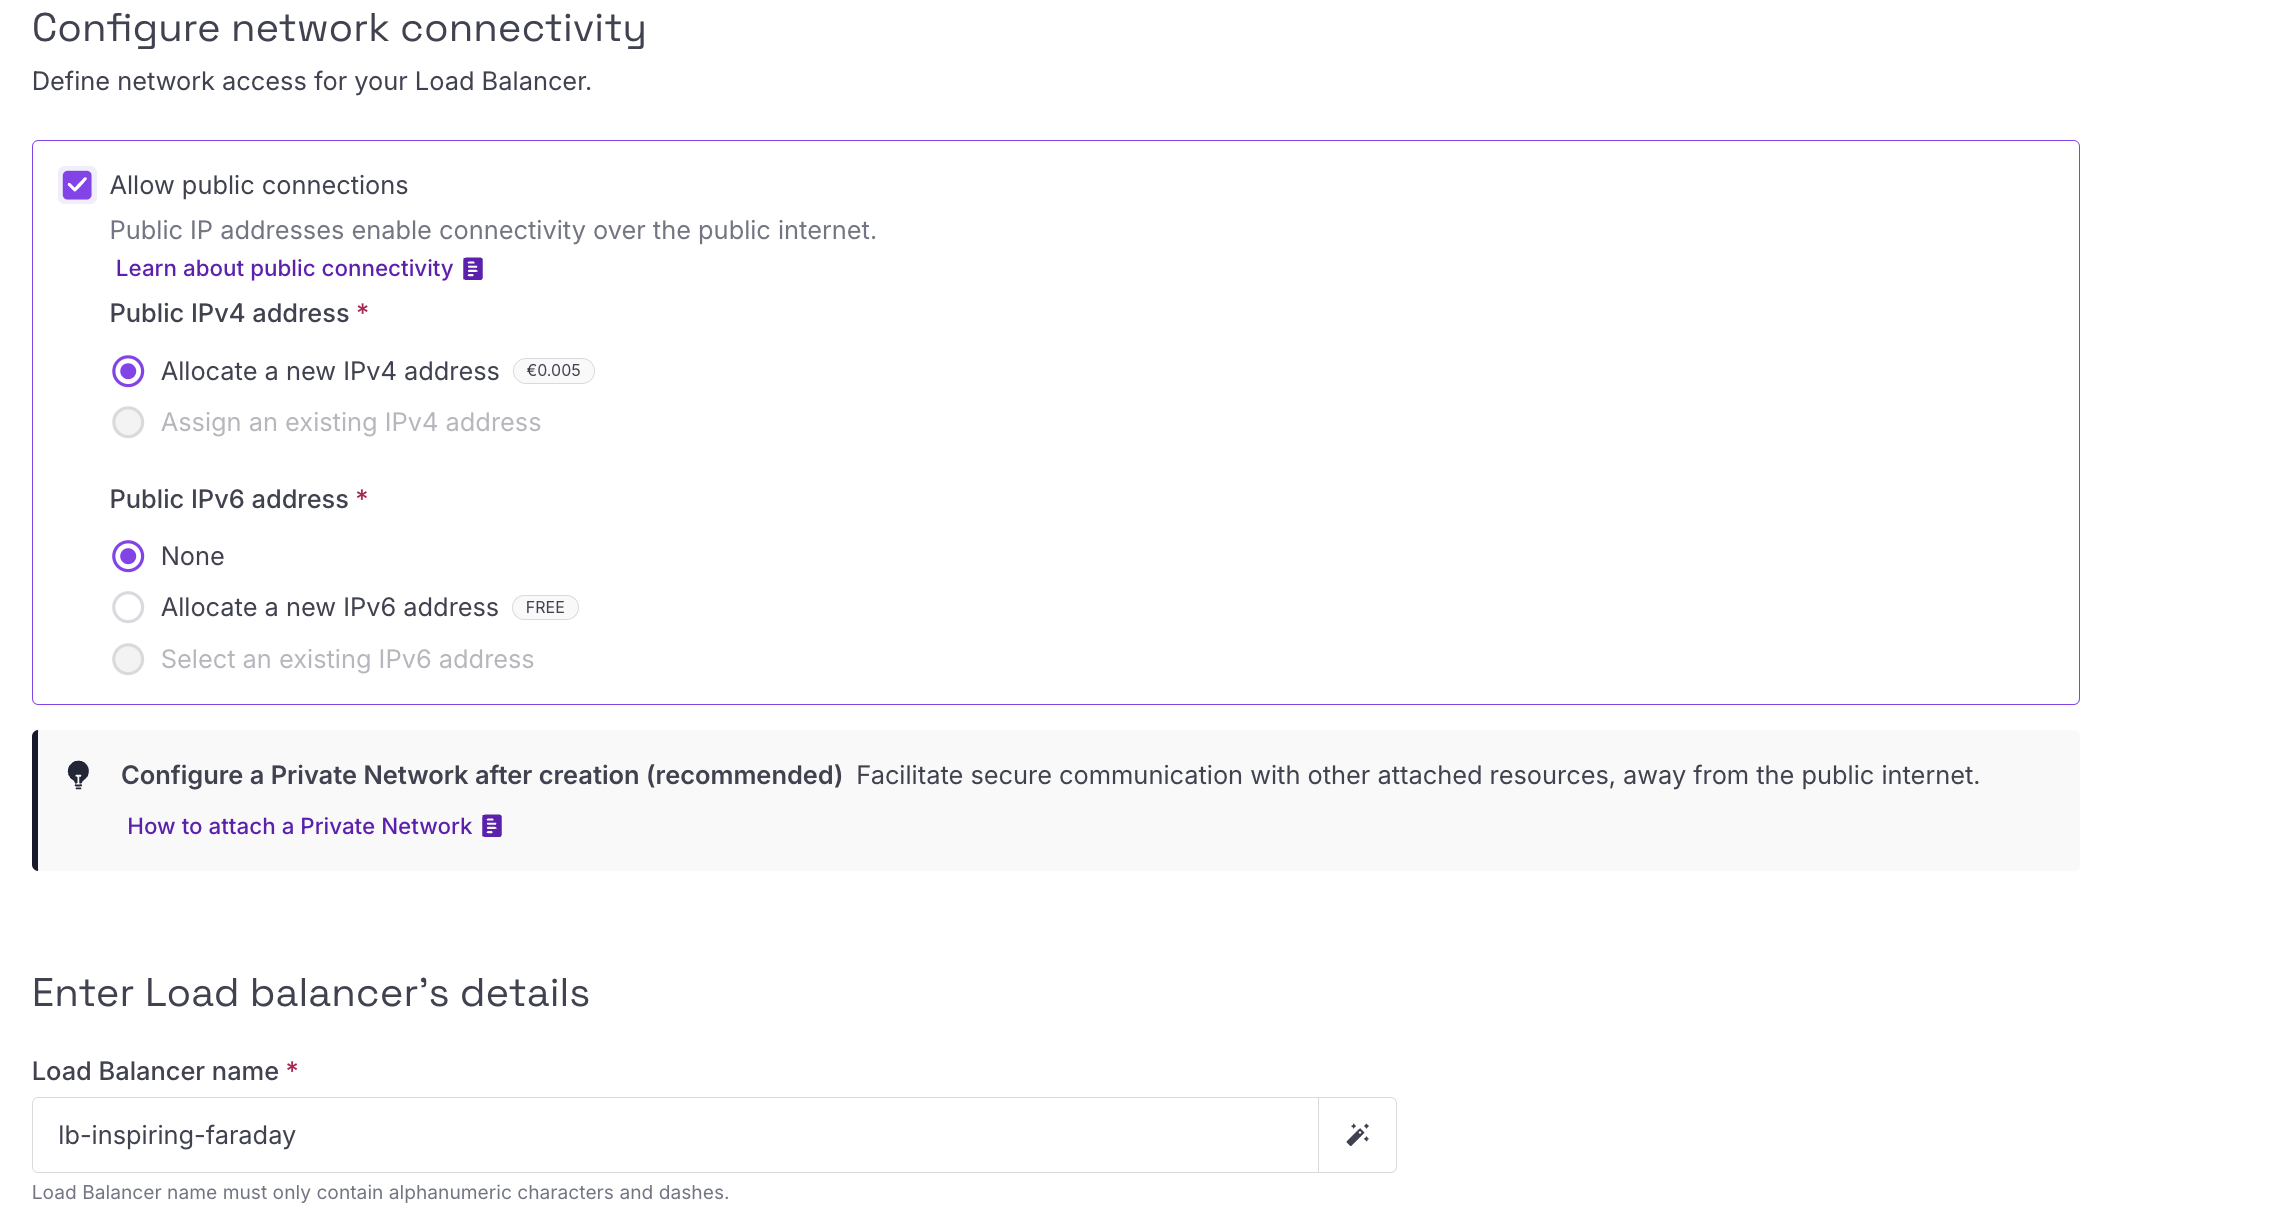
#In the Scaleway console, navigate to Network > Load Balancers and click Create load balancer. Configure the following:
- Zone: select the zone matching your Private Network
- Bandwidth: choose a bandwidth tier
- Network connectivity: enable Allow public connections and assign a public IPv4 address. IPv6 is not required
- Name: give the Load Balancer a name
When prompted for quick setup, skip it. We will configure everything manually.
Attach the Load Balancer to the Private Network
#Open the Load Balancer and go to the Private Networks tab. Click Attach to a private network, select the Private Network from Step 1, and leave Private IPv4 address set to auto-allocate from the pool.
Add a backend
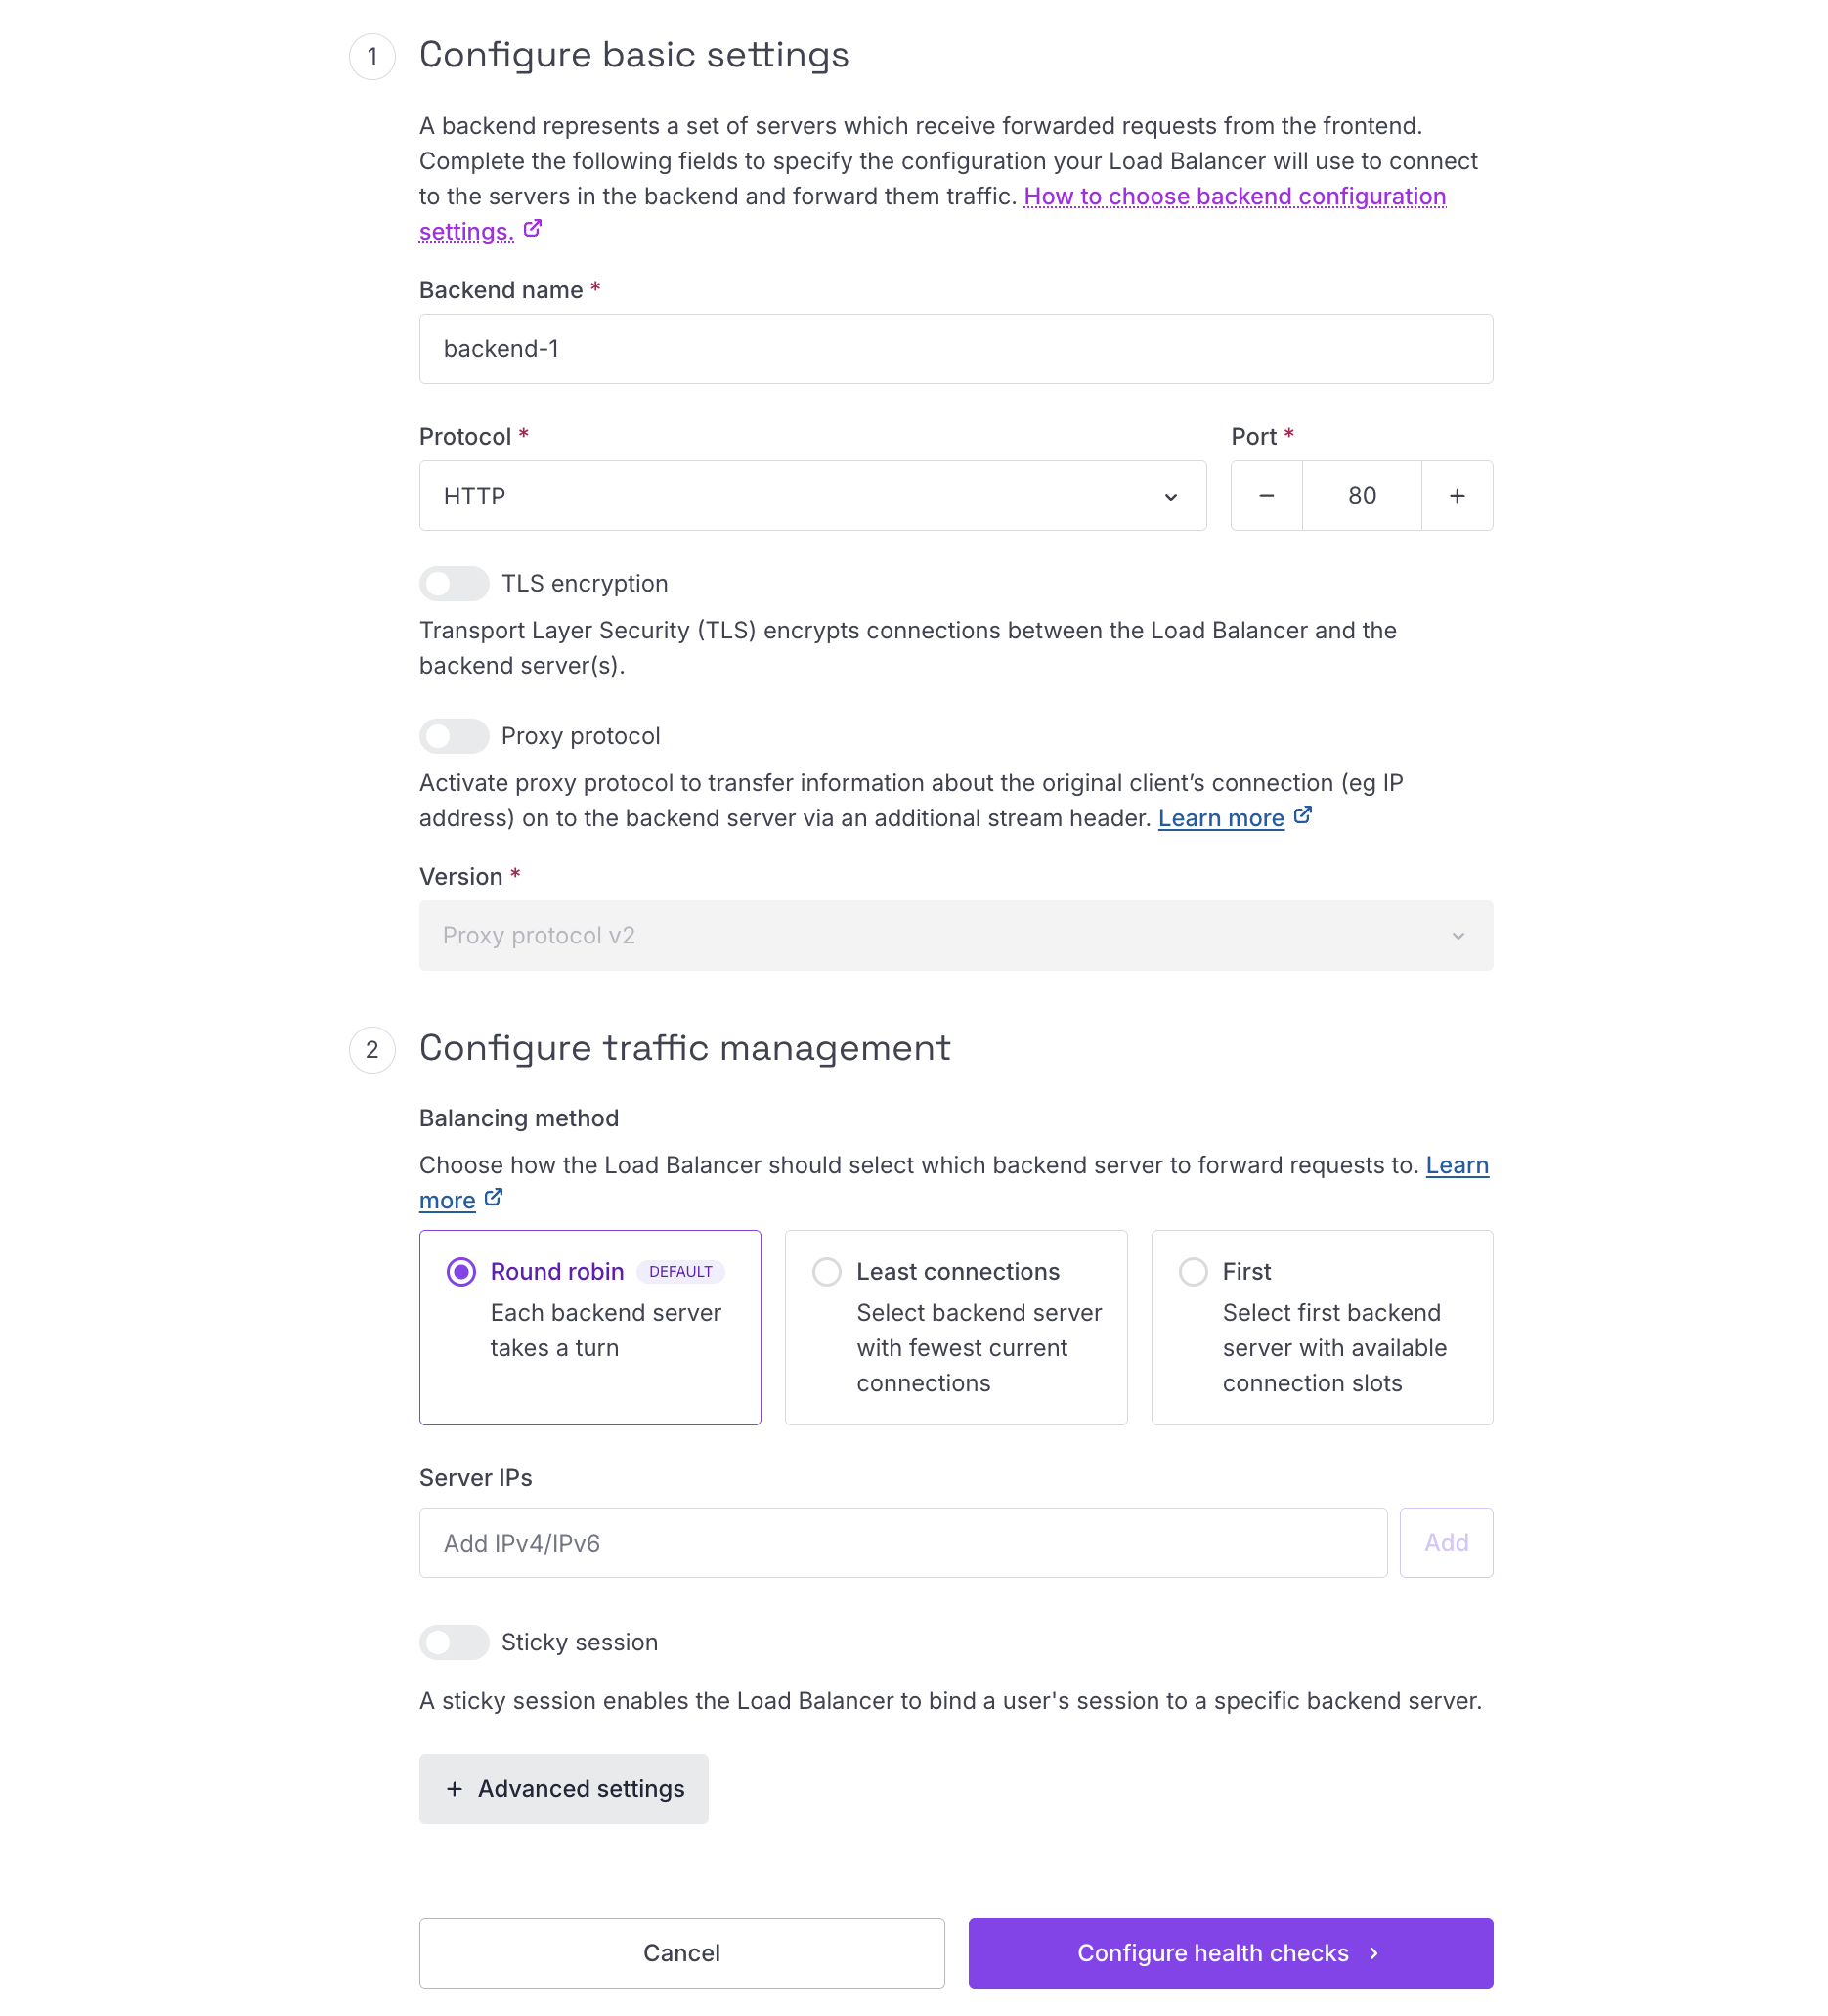
#Go to the Backends tab and click Add backend. Configure the following:
- Name: provide a name for the backend
- Protocol: HTTP
- Port: 80
- TLS encryption: leave disabled. PCP does not use HTTPS internally and the Private Network provides sufficient isolation
- Proxy protocol: leave disabled
- Balancing method: choose your preferred method (Round robin, Least connections, or First)
- Sticky session: enable if needed, disabled by default
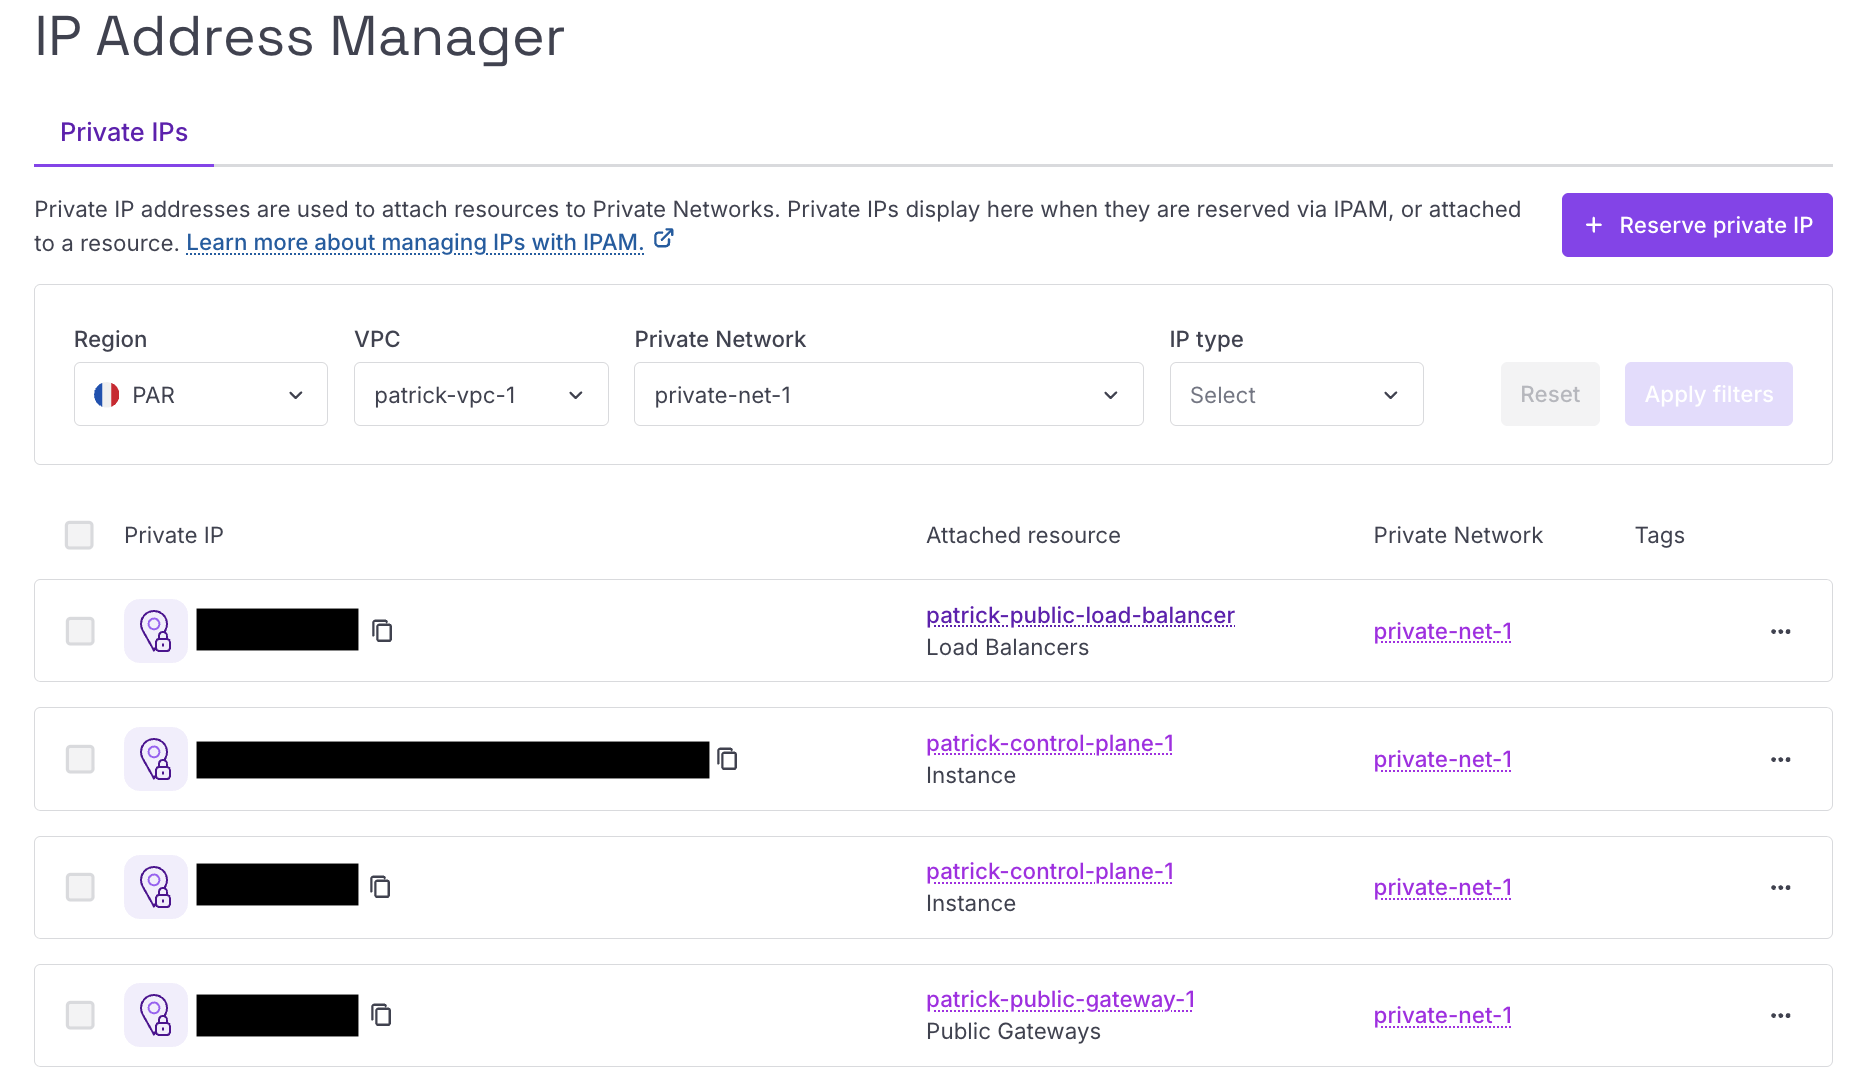
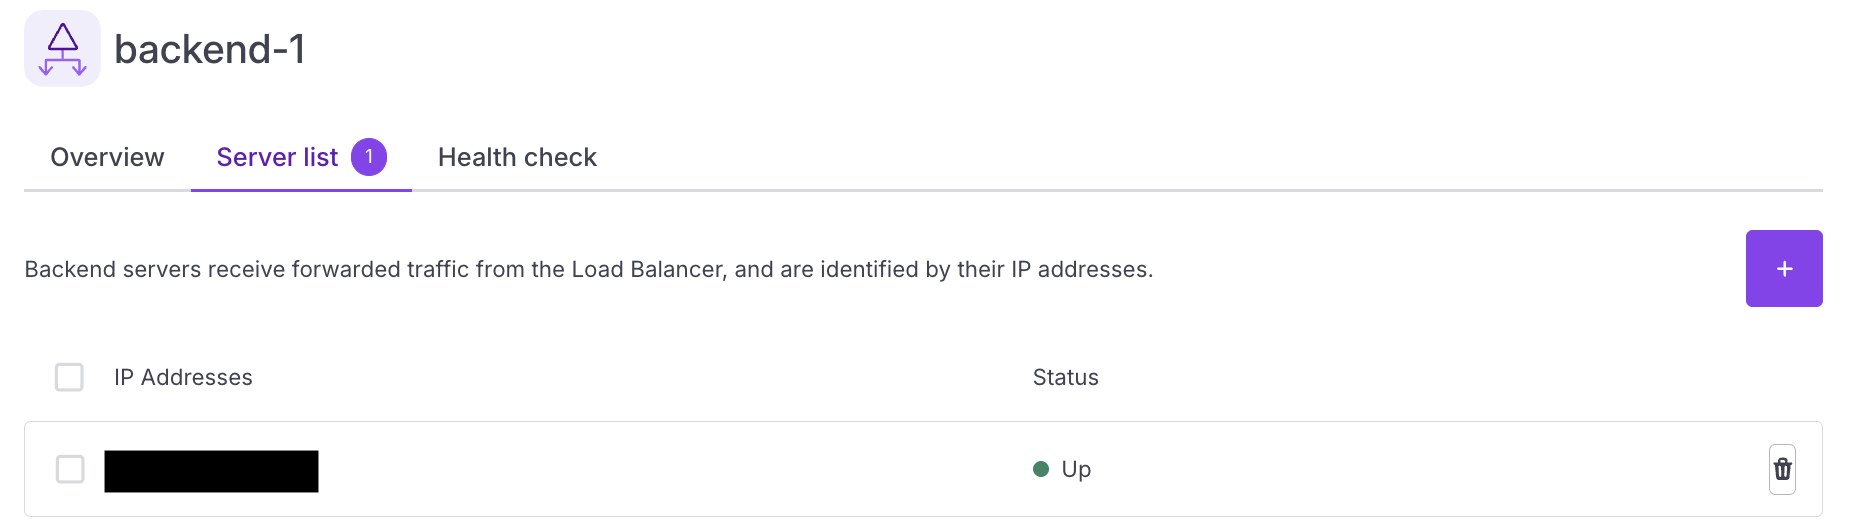
To add your PCP instance as a backend server, you need its private IP address. Navigate to Network > IPAM to find it, then enter it under Backend servers.
Configure the health check as follows:
- Type: HTTP
- Port: 80
- Method: GET
- Expected code: 200
- Path:
/login - TLS encryption: leave disabled
- Send Proxy protocol to Healthcheck: leave disabled

Once the backend is saved, you can monitor the health of your instance from the Servers tab on the backend details page. The Load Balancer will report the server status based on health check results.
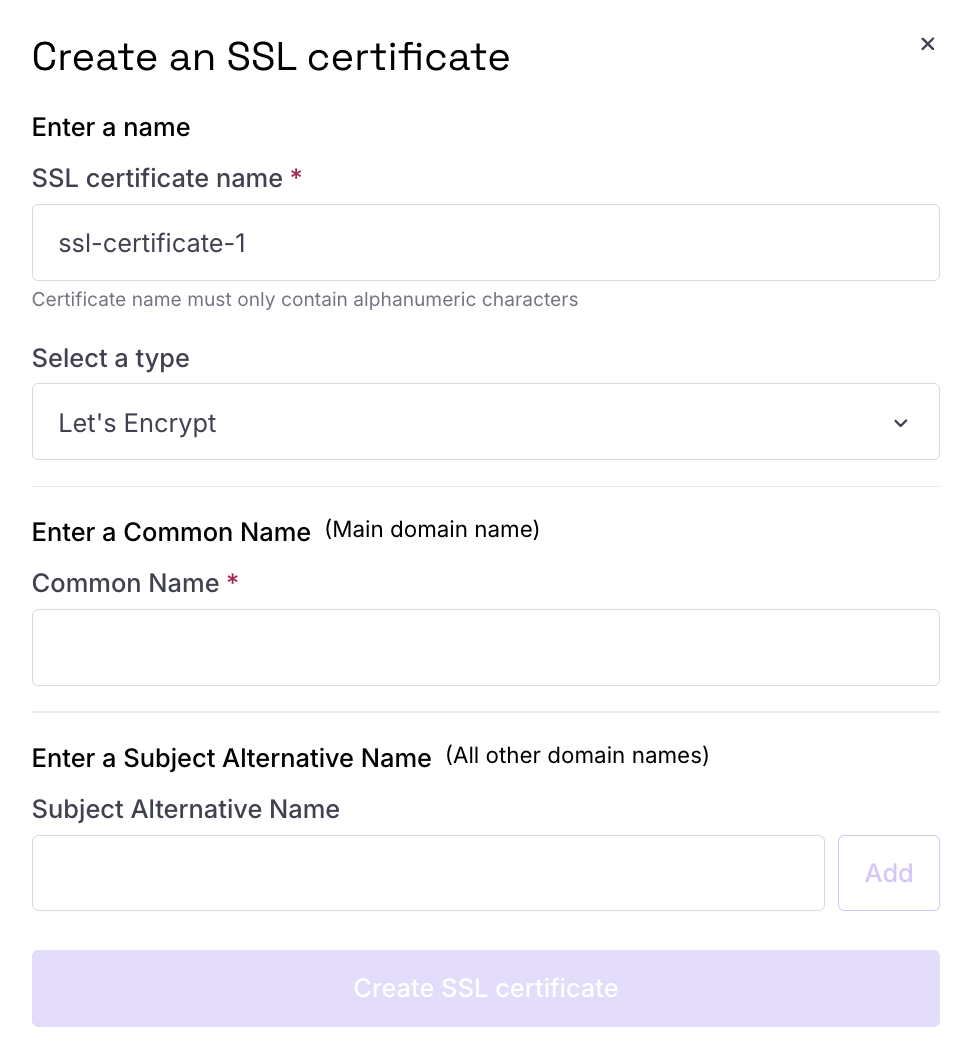
Create an SSL certificate
#Go to the SSL Certificates tab and click Create SSL certificate. Provide a name and choose one of two options:
- Let’s Encrypt: provide a Common Name (your main domain name) and Scaleway will generate the certificate automatically
- Import certificate: generate your own certificate using OpenSSL and paste the full PEM-formatted certificate chain, including the public key, private key, and optionally the certificate authorities
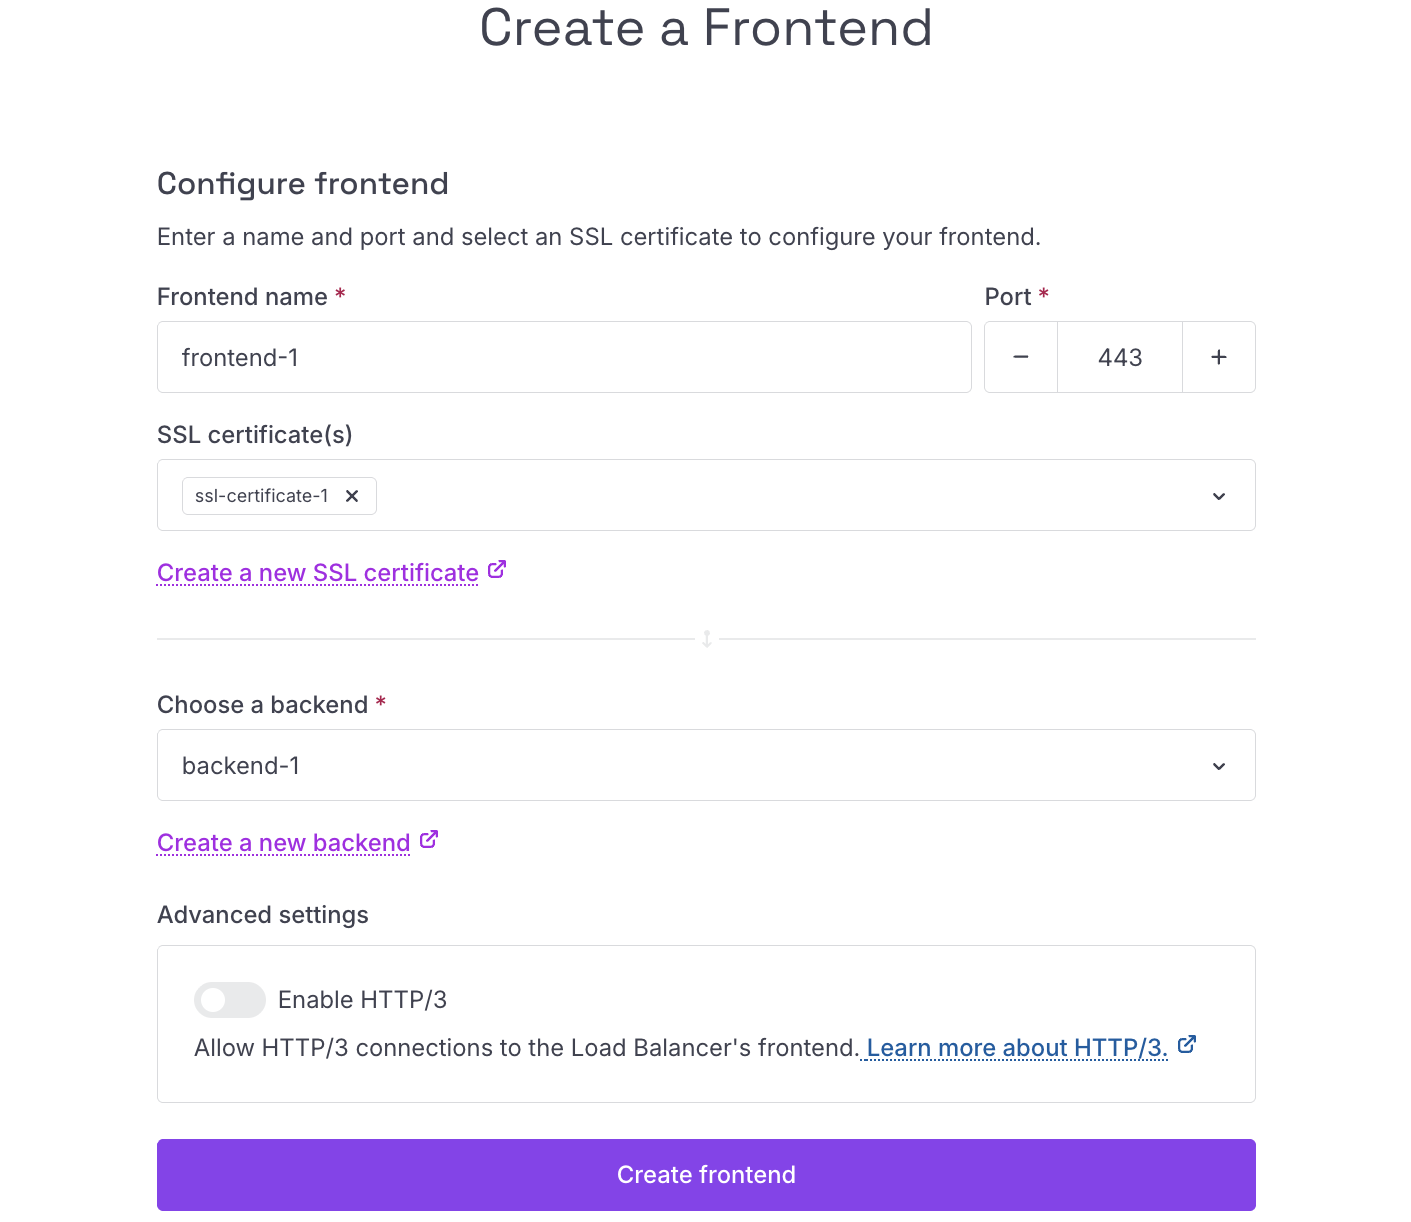
Add a frontend
#Go to the Frontends tab and click Add frontend. Configure the following:
- Name: provide a name for the frontend
- Port: 443
- SSL certificate: select the certificate created above
- Backend: select the backend created above
Click Create frontend. Your PCP instance is now accessible over HTTPS through the Load Balancer.
If you prefer to keep your Load Balancer off the public internet entirely, see Access Plakar Control Plane via SSH Bastion for an approach using SSH port forwarding through a bastion, with no public-facing load balancer.
What you have built
#Your Plakar Control Plane is now running on a Scaleway Private Network with no public IP exposed on the instance itself. A Public Gateway gives it outbound internet access, and a Load Balancer with a valid SSL certificate handles all inbound HTTPS traffic. The instance is reachable only through the Load Balancer, keeping it isolated from the public internet.